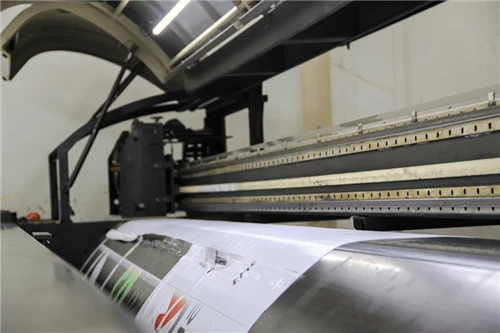
I. Introduction
A flexographic printing press is one of the largest capital investments a packaging converter makes. For many plants, it is the single most critical machine on the production floor. Yet, maintenance is often treated as an afterthought - something to address only when a press stops, a print defect appears, or a bearing fails. This reactive approach is expensive. Unplanned downtime on a flexo press can cost $500 to $2,000 per hour in lost production, wasted material, and overtime labor. Over a year, a plant with just one unplanned stop per week can lose $50,000 to $100,000 or more.
This guide provides a structured, actionable maintenance program for flexographic printing presses. It covers daily, weekly, monthly, and annual tasks, organized by press section: anilox rollers, doctor blades, plate cylinders, drying systems, bearings and drives, and electrical controls. By following this schedule, you can reduce unplanned stops by 40–60%, extend component life by 25–50%, and maintain consistent print quality.
For an overview of flexo press types and their maintenance implications, read more: 《The Types of Flexographic Printing Equipment》.

II. Why a Structured Maintenance Program Matters
The corrugated and flexible packaging industries operate on thin margins. Every minute of unplanned downtime directly reduces profitability. A well-maintained flexo press delivers:
- Higher OEE (Overall Equipment Effectiveness) – Less downtime, higher quality output.
- Lower consumable costs – Longer anilox roller life, fewer doctor blade changes, less ink waste.
- Consistent print quality – No sudden defects from worn components.
- Safer operation – Fewer unexpected mechanical failures that could injure operators.
Data from industry surveys show that plants with a documented preventive maintenance (PM) program experience 40–60% fewer unplanned stops than those relying on run-to-failure maintenance. The cost of a PM program is typically less than 5% of the annual cost of reactive repairs and lost production.
For similar maintenance principles applied to end-of-line automation, read more: 《Your Guide To Automatic Palletizer Maintenance: Maximizing Reliability And ROI》.
III. Daily Maintenance Tasks (Every Shift)
Daily tasks take 15–30 minutes per shift but prevent the majority of common print defects and mechanical issues.
3.1 Anilox Roller Inspection
- Visual check: Inspect the anilox roller surface for scratches, plugged cells, or edge damage. Use a magnifying glass or a handheld microscope (30–50x) for cell inspection.
- Cleanliness: If visible residue remains from the previous job, reclean immediately. Dried ink in cells reduces ink transfer and causes mottling.
- Journal and bearing check: Feel for unusual heat or vibration while the press is idling.
3.2 Doctor Blade System
- Blade wear: Check the doctor blade edge for nicks, wear marks, or bending. A worn blade causes streaks and inconsistent ink density.
- Seals and gaskets: Inspect chamber seals for leaks. Even a small leak wastes ink and creates a hazardous slip condition.
- Pressure settings: Verify that blade pressure is set according to the job recipe. Excessive pressure accelerates blade and anilox wear.
3.3 Plate Cylinders and Printing Plates
- Plate surface: Wipe plates with a soft cloth and appropriate solvent (check plate manufacturer's recommendation). Look for cracks, lifting edges, or plugged relief areas.
- Cylinder bearings: Rotate each plate cylinder by hand. It should turn smoothly without grinding or rough spots.
- Mounting tape condition: If plates show edge lifting, remount or replace tape.
3.4 Impression Cylinder
- Surface cleanliness: Remove any ink buildup or paper dust. Use a non‑abrasive cleaner.
- Check for damage: Look for nicks, dents, or embedded debris that could transfer to the substrate.
3.5 Ink System
- Ink viscosity: Measure viscosity with a Zahn cup or automatic viscometer. Adjust as needed.
- pH (for water‑based inks): Maintain pH between 8.5 and 9.5. Low pH causes poor drying; high pH attacks anilox ceramic.
- Ink filters: Clean or replace inline filters if flow rate has dropped.
3.6 Drying System
- Air nozzles: Check for clogging. Restricted nozzles cause incomplete curing and smearing.
- UV lamp status (if applicable): Verify lamp intensity and reflector cleanliness. UV lamps lose output over time.
3.7 General Housekeeping
- Remove ink spills immediately. Dried ink is difficult to remove and can damage surfaces.
- Vacuum paper dust and debris from around print stations and electrical cabinets.
- Check for air leaks in pneumatic lines (hissing sounds). Air leaks reduce system pressure and waste energy.
IV. Weekly Maintenance Tasks
Weekly tasks require 1–2 hours and address components that wear more slowly but still need regular attention.
4.1 Anilox Roller Deep Cleaning
- Use a dedicated anilox cleaner (chemical or ultrasonic). Do not use abrasive pads or metal brushes - they scratch ceramic coatings.
- Inspect cell structure with a microscope. If more than 5–10% of cells are plugged after cleaning, schedule a professional reconditioning.
- Measure anilox volume (BCM) periodically using a handheld density gauge or send to a lab. A 20% loss of volume indicates the roller needs re-engraving or replacement.
4.2 Doctor Blade Replacement
- Replace doctor blades after 40–80 hours of running time, depending on ink type and blade material. Keep a log of blade life for each press.
- Check the blade chamber for ink buildup and clean thoroughly.
- Inspect the backing blade and replace if warped or worn.
4.3 Bearings and Lubrication
- Grease fittings: Apply recommended grease to all bearing points (plate cylinders, anilox rollers, impression cylinders). Follow the OEM's grease type and quantity - over‑greasing can damage seals.
- Check for unusual noise or heat during operation. Use an infrared thermometer; any bearing surface exceeding 160°F (70°C) needs investigation.
4.4 Tension Control System
- Inspect dancer rollers and load cells for free movement.
- Check web guide sensors for dust buildup. Clean with compressed air.
4.5 Electrical Enclosures
- Inspect cooling fans on control cabinets. Clogged filters cause overheating of drives and PLCs.
- Check for loose wiring or signs of arcing (burn marks). Tighten terminal blocks as needed.
V. Monthly Maintenance Tasks
Monthly tasks take 4–8 hours and should be scheduled during planned downtime, such as a weekend shift.
5.1 Comprehensive Anilox Audit
- Remove each anilox roller and inspect off‑press.
- Measure cell volume and compare to original specification.
- Rotate rollers between stations to distribute wear evenly (if rollers are interchangeable).
- Send severely worn rollers to a specialist for re‑ceramic coating and re‑engraving. Typical reconditioning cycle: 12–24 months depending on usage.
5.2 Plate Cylinder Runout Check
- Use a dial indicator to measure cylinder runout. Acceptable runout: ≤0.02 mm (0.0008 inch). Higher runout causes banding and uneven ink transfer.
- Check cylinder bearings for play. Replace if radial clearance exceeds manufacturer spec.
5.3 Impression Cylinder Pressure Calibration
- Use a pressure measurement film (e.g., Fuji Prescale) or a digital pressure gauge to verify nip pressure across the cylinder width.
- Adjust as needed to ensure even pressure ±5% across the face.
5.4 Drying System Performance
- Measure exhaust air temperature at each drying station. Compare to baseline.
- Clean UV lamp reflectors with alcohol and a soft cloth. Dull reflectors reduce curing efficiency by 30–50%.
- Check UV lamp hours and replace lamps when they reach 80% of rated life (e.g., 1,000–1,500 hours).
5.5 Ink Pump and Agitator
- Inspect pump diaphragms (for air‑operated pumps) for cracks.
- Check agitator blades for wear or breakage.
- Clean ink tanks thoroughly to remove dried ink skins.
5.6 Safety Systems
- Test emergency stops on every station. They must stop the press instantly.
- Verify light curtain function (if installed). Walk through the beam and confirm press stops.
- Inspect safety guards for damage or missing fasteners.

VI. Annual Maintenance and Overhaul
Annual tasks require 2–5 days of planned downtime. For high‑volume plants, schedule during a holiday shutdown or low‑demand period.
6.1 Full Mechanical Inspection
- Check gear backlash between all driven rollers. Excessive backlash causes register variation. Adjust or replace worn gears.
- Inspect all bearings in the main drive train. Replace any with signs of spalling, overheating, or corrosion.
- Measure drive belt tension (for belt‑driven presses) and adjust.
- Check alignment of print stations to the substrate path. Use a laser alignment tool.
6.2 Electrical and Control System
- Back up all PLC programs, job recipes, and parameters to an external drive. Store off‑site.
- Update firmware (if recommended by OEM).
- Replace aging capacitors in drive cabinets - a common cause of unexpected drive failure after 7–10 years.
- Calibrate all sensors (web guides, tension sensors, registration cameras).
6.3 Anilox Roller Reconditioning
- Send all anilox rollers for professional cleaning, cell inspection, and re‑ceramic coating if cell volume loss exceeds 20%. Budget for this every 2–3 years for heavily used rollers.
6.4 Drying System Overhaul
- Clean drying tunnels internally to remove ink mist and dust buildup. Built‑up residue can be a fire hazard.
- Replace UV lamps (if not already done during monthly checks).
- Calibrate temperature sensors in hot air dryers.
6.5 Pneumatic System
- Replace air filters on the main air supply line.
- Check air dryer operation (dew point). Wet air causes corrosion in pneumatic valves.
- Lubricate air cylinders (if equipped with lubricators).
6.6 Documentation Update
- Review maintenance logs for recurring issues. Use root cause analysis to eliminate chronic problems.
- Update spare parts inventory based on actual consumption. Ensure critical parts (anilox rollers, doctor blades, bearings, belts) are in stock.
- Schedule operator refresher training - many problems are caused by incorrect operation, not mechanical failure.
VII. Common Flexo Press Problems and Their Maintenance Roots
| Problem | Most Likely Maintenance Cause | Preventive Action |
|---|---|---|
| Streaks in print | Worn doctor blade or plugged anilox cells | Replace blade weekly; deep clean anilox monthly |
| Mottled / uneven ink density | Anilox cell damage or incorrect volume | Inspect cells weekly; measure volume monthly |
| Ghosting (repeating pattern) | Plate cylinder bearing wear or out‑of‑round | Check runout monthly; replace bearings annually |
| Poor register | Loose gears or worn tension sensors | Inspect backlash annually; calibrate sensors annually |
| Ink leaking from chamber | Worn chamber seals or incorrect blade pressure | Inspect seals daily; verify pressure daily |
| Smearing / incomplete drying | Clogged dryer nozzles or UV lamp aging | Clean nozzles daily; replace UV lamps at 80% life |
| Banging noise during operation | Loose belt or worn bearing | Tighten belts weekly; inspect bearings monthly |
VIII. Spare Parts Inventory Recommendations
Keep these critical spares on hand to avoid extended downtime:
| Component | Recommended Stock Level | Lead Time Risk |
|---|---|---|
| Doctor blades (full set) | 2–4 weeks' supply | Low if ordered regularly |
| Anilox roller (most used specification) | 1 spare roller | High (weeks to months) |
| Plate cylinder bearings (set) | 1 full set per press | Medium (2–4 weeks) |
| Drive belts | 1 set | Low |
| Ink pump diaphragm kits | 2–3 kits | Low |
| UV lamp (if applicable) | 1 spare per station | Medium (1–2 weeks) |
| Tension sensor load cell | 1 spare | High (4–8 weeks) |
| Emergency stop button | 2–3 units | Low |
IX. Training Your Operators for Better Maintenance
Even the best maintenance schedule fails if operators are not trained to spot early warning signs. A well‑trained operator is your first line of defense.
Essential Operator Skills
- Daily inspection routine (visual and tactile checks of anilox, blades, plates)
- Recognizing abnormal sounds (bearing noise, air leaks, belt squeal)
- Monitoring print quality (identifying streaks, ghosting, mottling as they start)
- Proper cleaning techniques (correct solvents, non‑abrasive tools)
- Logging observations in a shift log or digital CMMS
Invest in cross‑training at least two operators per shift on basic troubleshooting. When a small problem occurs at 2 AM, having an operator who can adjust blade pressure or clean a sensor can save hours of downtime waiting for a technician.
For a broader understanding of how automation and maintenance intersect, read more: 《Robotic Palletizer Trends 2026: AI, Cobots, and the Future of Box Plant Automation》.

X. Sample Preventive Maintenance Log Template
| Date | Shift | Component | Action Taken | Operator Initials | Notes |
|---|---|---|---|---|---|
| Anilox roller | Cleaned, inspected | No damage | |||
| Doctor blade | Replaced after 65 hours | Old blade had nicks | |||
| Bearings | Greased (2 pumps each) | ||||
| Dryer nozzles | Cleaned with wire |
Use a digital CMMS (Computerized Maintenance Management System) if possible. It can schedule recurring tasks, track costs, and alert you when parts need replacement.
XI. Conclusion
A flexographic printing press is a precision machine. Like any precision machine, it requires disciplined, routine care. The difference between a press that runs reliably for 20 years and one that suffers constant breakdowns is not the brand - it is the maintenance culture.
Implement the daily, weekly, monthly, and annual tasks outlined in this guide. Train your operators to be active observers. Keep critical spares in stock. And when you encounter a recurring problem, use root cause analysis to fix it permanently - not just patch it.
The hours you invest in preventive maintenance will return as higher uptime, better print quality, lower waste, and a safer workplace. In today's competitive packaging market, that is not just good practice - it is a competitive advantage.