
The cheapest automatic stacker preventive maintenance you will ever do is the routine you skip. Most corrugated flip-flop stacker downtime does not come from broken parts - it comes from air pressure that drifts below 0.4 MPa, side sensors buried in dust, and four-corner cage screws that loosen under vibration. This guide gives you a flip flop stacker preventive maintenance plan you can tape to the machine: a daily-to-annual schedule, component-by-component care, and the five mistakes that quietly turn a healthy auto stacker machine into a stoppage.
If you run an automatic stacking machine, the terms full automatic stacker machine, auto stacker, and automatic flip-flop stacker all describe the same 180° alternating unit we cover here - the one that flips every other sheet so the stack leaves square and warp-free. New to the principle? Our explainer on the automatic flip-flop stacker walks through how it works before you pick up a wrench.
This is a maintenance guide, not a repair manual. If your machine is already showing faults - a baffle that lifts but will not feed, a stacker that will not start after reset, or a flipping cage that sits uneven after a ring check - read our automatic stacker troubleshooting guide first; those three faults are exactly what this plan is built to prevent. We cover the flip-flop (180° alternating) stacker only. If you run an inline downstacker, its preventive steps differ and a separate technical guide is the sibling article to read, so the two PM guides do not blur into one.
The single red line runs through everything below: keep your pneumatic supply at 0.4–0.6 MPa and never let it fall below 0.4 MPa. Industrial compressed-air standards put the usable end-of-line supply at 0.4–0.6 MPa (4–6 bar) for a reason - below 0.4 MPa the baffle cylinder cannot travel far enough for the side sensor to read home, and the stacker silently refuses to feed. Hold that line and most of this article becomes routine.
Key takeaways
- Air at 0.4–0.6 MPa, never below 0.4. A daily gauge check removes most no-feed stoppages before a shift starts.
- Side sensors must stay normally-on. Blow the lens each shift and confirm a steady light weekly; dust is the silent cause of false "no home" reads.
- The flipping cage lives on four corner screws. A weekly even-torque pass and a quarterly level check stop the one-side-higher jam pattern.
- Safety interlocks get a monthly function test - and are never bypassed. A jumpered guard is a crush waiting to happen.
- Most stacker faults are preventable with a printed checklist and a wrench, not a service call.
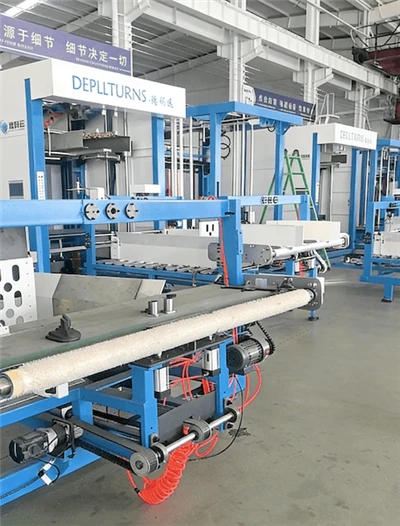
Your Automatic Stacker Preventive Maintenance Schedule (Daily / Weekly / Monthly / Quarterly)
A schedule you cannot run is a poster, not a plan. The table below is the same four-tier skeleton our service team uses on customer lines, scaled from the classic Daily–Weekly–Monthly–Quarterly rhythm. Print it, initial it each shift, and the three faults from the troubleshooting guide largely stop showing up on your shift report.
|
Frequency |
Task |
How to do it |
Red line |
|
Daily (each shift, before run) |
Air pressure check |
Read the cylinder-line gauge; adjust the regulator into range |
0.4–0.6 MPa; never below 0.4 MPa |
|
Daily |
Visual sweep |
Listen for hissing, look for loose brackets, check the safety light curtain is clear |
No leak you can hear, no guard obstructed |
|
Daily |
Side sensor lens |
Blow dust off the sensor lens with clean dry air |
Lens clear; indicator steady normally-on |
|
Weekly |
Side sensor bracket |
Confirm bracket tight; verify indicator holds normally-on at home |
Any blink or dark light = re-align now |
|
Weekly |
Flipping-cage four-corner screws |
Torque all four corners evenly with a wrench |
Loose or uneven torque = level and re-lock |
|
Weekly |
FRL (filter / regulator / lubricator) |
Drain the filter bowl, check oiler level, set lubricator drip |
No water in the bowl; oiler not empty |
|
Monthly |
Safety interlock test |
Verify main/aux table conditions allow run |
Never defeat; log the condition check |
|
Monthly |
Electrical & cabinet |
Tighten terminals, blow dust from the control cabinet |
No loose lug; cabinet clean and cool |
|
Monthly |
Belt & rail lubrication |
Lube per manual; inspect for wear and alignment |
Fraying or binding = replace before failure |
|
Quarterly / Annual |
PLC program backup |
Save the current program to removable media |
A current backup on file |
|
Quarterly |
Flipping-cage level |
Fine-level the cage with a straightedge; re-torque |
No measurable side-to-side tilt |
|
Annual |
Wear-part assessment |
Inspect belts, bearings, seals; replace on life |
Replace on condition, not on failure |
Scale the cadence to your production load. A single-shift job shop can hold the weekly items to a true seven-day beat. A three-shift, high-output line should treat "daily" as every shift and move sensor cleaning to every two hours in a dusty board environment - the same logic a roll-forming line uses to keep stackers consistent under heavy load. Match the interval to the hours on the machine, not the calendar.
Looking at the Full Automatic Stacker Machine (DFM-1510-P / 1710-P) for your line? Request the DFM-series specifications and we will send the laminated checklist our service team uses on customer lines - the same one this schedule came from.
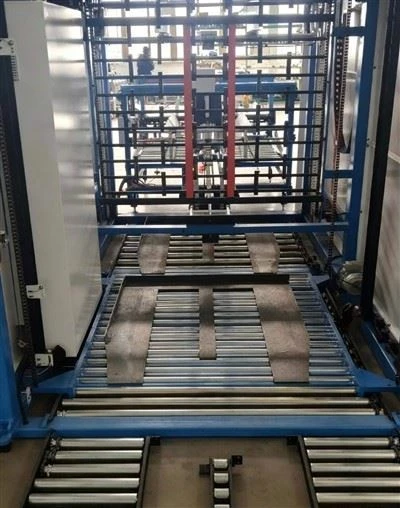
Component-by-Component Care
The schedule tells you when. This section tells you how, part by part. Each block is a short procedure you can hand to a mechanic.
Pneumatic System - Keep Air at 0.4–0.6 MPa
The pneumatic system is the heart of the stacker, and it is where most preventable stoppages begin. The baffle cylinder needs a stable 0.4–0.6 MPa supply; below 0.4 MPa it cannot seat far enough for the side sensor to confirm home, and the controller correctly refuses to feed.
1,Read the gauge at the start of every shift. Open the regulator and confirm the cylinder-line gauge sits inside 0.4–0.6 MPa. Do not over-pressurize past 0.6 MPa - higher pressure stresses seals and buys nothing.
2,Service the FRL triplet weekly. Drain the filter bowl (water in the line is the enemy of every seal), confirm the oiler has oil, and set the lubricator drip to the manual's spec. A dry lubricator is a seized cylinder a month later.
3,Listen for leaks. Walk the hose runs and fittings with the line running. A persistent hiss is lost pressure and lost cycles; tighten the fitting or swap the line before it drops you below the red line.
4,Add a buffer if your plant air is marginal. On lines fed from a shared shop supply, a small local buffer tank or a low-pressure alarm on the stacker line catches a droop before it stops a run.
On a three-shift plant we support, the stacker "ate" a no-feed call every Tuesday - always after the morning air compressor cycled. A $40 buffer tank on the stacker line removed the Tuesday calls entirely. The fix was never the stacker; it was the air.
Side Sensors - Clean and Tighten to Normally-On
The side sensor switch watches the cylinder's home position. It must read steady on (normally-on) when the cylinder is home. Dust on the lens, or a bracket vibrated out of position, drops that signal and the stacker thinks the baffle never arrived.
1,Blow the lens each shift. Use clean, dry, oil-free air - never a shop rag that sheds lint into the beam path. On a high-dust board line, do it every two hours.
2,Tighten the bracket weekly. Vibration walks switches out of position over weeks. A dab of thread-locker on the bracket screw and a monthly look at the indicator light pays for itself.
3,Confirm normally-on at home. With the cylinder at home, the indicator should be a solid on. A blink or a dark light means the target has drifted - re-align until it holds steady before you trust the machine to feed.
Flipping Cage - Four-Corner Screw Torque
The flipping cage is held by four screws at its four corners. If they loosen or sit at uneven torque, the cage rocks on its mounts and the reset ring check simply "learns" the tilt as its new zero. Sheets then jam or stack crooked on one side.
1,Torque all four corners weekly, evenly. Work corner-to-corner so the load stays balanced. Even torque on all four is what keeps the cage from drifting.
2,Fine-level quarterly. Put the cage at service position, set a straightedge across it, and bring all four corners to the same plane. Re-torque.
3,Re-level after any cage removal. If you pull the cage for a belt change or a deep clean, treat the old zero as gone. Level first, then run the ring check - never the reverse.
A box plant we visited chased "sensor faults" for a month. The real cause was a corner screw walking out two turns a week; the cage tilted a hair, jammed on the same side every time, and the ring check kept re-teaching the tilt. One weekly torque pass on four screws ended it.
Belts and Guide Rails - Lubrication
Belts carry the stacked sheets; rails guide them. Both hate two things: running dry and running over-lubricated (excess grease collects dust and turns into grinding paste).
1,Lubricate monthly per the manual. Use the specified grease, not "whatever is in the gun." Apply to the named points only.
2,Avoid over-lubrication. A thin film beats a glob. Wipe the excess so it cannot trap board dust.
3,Check tension and alignment. A belt that rides to one edge will eventually roll off mid-run. Align the rails and set tension to the manual's spec.
4,Inspect for wear and replace on condition. Fraying, glazing, or binding means the part is on its way out. Swap it on a planned shutdown, not during a panic at 2 a.m.
Safety Interlocks - Monthly Function Test
The stacker only runs when its safety interlock conditions are met - position relationships between the main table and the auxiliary table. A green "position" light confirms the machine is homed, not that every interlock condition is satisfied, which is why a no-start after reset so often looks like a dead controller.
1,Test both interlock conditions monthly. Empty main table → raise to highest position with aux table fully in position. Loaded main table → aux table in the lower position. Confirm run-enable appears only when conditions are true.
2,Never bypass or short the interlock. It exists to stop the machine when the tables are not in safe positions. A jumpered guard removes the only thing standing between a moving cage and an operator's hands.
3,Follow LOTO before any adjustment. Lock out, tag out, then seat the tables properly and resume. If the interlock will not clear after the conditions are met, that is an electrical fault to diagnose - not a reason to disable the guard.
5 Common Stacker Maintenance Mistakes
These are the habits that turn a healthy machine into the three faults in the troubleshooting guide. Each one maps to a failure it causes.
1. Running the air below 0.4 MPa and calling it "close enough." A gauge reading 0.38 MPa is not "almost fine" - it is below the point where the cylinder seats for the sensor. → Triggers Fault 1: baffle lifts but the stacker will not feed. Hold 0.4–0.6 MPa or you are borrowing stoppages from next week.
2. "Fix it when it breaks" instead of a maintenance rhythm. A stacker with no schedule accumulates slack in every joint. The no-feed, the no-start, and the tilted cage all arrive together, and diagnosis takes longer because everything is suspect at once. → Compounds all three faults. Ten minutes a shift beats a four-hour teardown.
3. Leaving sensor dust to "whenever someone remembers." Dust on the side-sensor lens is the silent cause of false no-home reads. On a dusty board line, a weekly-only clean is too slow. → Triggers Fault 1. Blow the lens each shift; verify normally-on weekly.
4. Ignoring the four-corner cage screws until sheets jam. Loose or uneven corner torque lets the cage tilt, and the ring check bakes the tilt in. → Triggers Fault 3: flipping cage one side higher after reset. A weekly even-torque pass is the cheapest insurance on the machine.
5. Shorting the safety interlock to "keep production moving." It is tempting on a hot order, and it is the most dangerous mistake on this list. A bypassed guard means the machine will run with the tables in unsafe positions - exactly the condition designed to prevent a pinch or crush. → Masks Fault 2 and creates a safety hazard. Never defeat the interlock; satisfy the conditions properly.
We have stood on lines where a supervisor jumpered the interlock "just for the rush." On one, an operator reached in during a misfeed and the cage cycled - a near-miss that ended with the jumper cut and the condition procedure taped to the panel. No order is worth a hand. The interlock is not a suggestion.
FAQ
Q: What faults can preventive maintenance actually prevent?
A: Mostly the three our troubleshooting guide covers. A daily air check at 0.4–0.6 MPa prevents the baffle-lifts-but-no-feed fault. Weekly sensor cleaning and four-corner torque prevent the no-feed and flipping-cage-uneven faults. A monthly interlock test prevents the won't-start-after-reset misdiagnosis. None of them needs a new board - they need a wrench on a schedule.
Q: How often should I service or check my automatic stacker?
A: Daily (each shift): air pressure, visual sweep, sensor lens. Weekly: sensor bracket, four-corner cage torque, FRL service. Monthly: interlock test, electrical/cabinet, belt and rail lubrication. Quarterly/Annual: PLC backup, cage level, wear-part assessment. On heavy or dusty lines, compress "daily" to every shift and sensor cleaning to every two hours.
Q: What air pressure does a corrugated flip-flop stacker need?
A: The baffle cylinder working range is 0.4–0.6 MPa (4–6 bar). Keep it inside that band and never let it fall below 0.4 MPa - below that the cylinder cannot travel far enough for the side sensor to read home, and the stacker will not feed. Above 0.6 MPa stresses seals and gains nothing.
Q: How often should I clean the side sensors?
A: At minimum each shift - blow the lens with clean dry air and confirm a steady normally-on indicator. On a high-dust corrugated line, clean every two hours, because accumulated dust is the most common cause of a false no-home read and the resulting no-feed stoppage.
Q: How often do I replace stacker wear parts like belts, bearings, and seals?
A: On condition, assessed quarterly - there is no single calendar date, because life depends on production hours and dust load. Inspect belts for fraying or glazing, bearings for play or noise, and seals for weeping, then replace during a planned shutdown rather than waiting for a failure that stops the line.
Q: Can I bypass the safety interlock to keep production running?
A: No. Never short, jumper, or defeat the safety interlock. It exists to stop the machine when the main and auxiliary tables are not in their safe positions, and bypassing it removes the only thing preventing a crush or pinch injury. Follow your plant's LOTO procedure before any adjustment, satisfy the interlock conditions properly, and resume. If the interlock will not clear after the conditions are met, that is an electrical fault to diagnose - not a reason to disable the guard.
Watch the Maintenance Done On-Site
See the care routines performed on a real customer line by the machine's own builder - Chinese audio with English subtitles, so you can follow the hands even if you do not speak the language.
What the footage shows, task by task:
- Air pressure check: the owner reads the cylinder-line gauge and brings the supply into the 0.4–0.6 MPa band, drains the FRL filter bowl, and confirms the lubricator is feeding.
- Side sensor clean and tighten: he blows the lens with dry air, checks the bracket for play, and verifies the indicator holds a steady normally-on light at the cylinder home position.
- Flipping-cage four-corner leveling: he loosens all four corner screws, hand-levels the cage against a straightedge, locks the corners evenly, and re-runs the ring check so sheets stack square.
These clips are the fastest way to train a new mechanic - and the proof that most automatic stacker preventive maintenance is a setting and a torque wrench, not a spare part.
Conclusion
Most automatic stacker preventive maintenance comes down to three habits: keep the air at 0.4–0.6 MPa and never below 0.4, keep the side sensors normally-on and dust-free, and keep the flipping cage four corners evenly torqued and level. Add a monthly safety-interlock test you never bypass, and the three faults from the troubleshooting guide largely stop showing up. Print the schedule, initial it each shift, and the machine rewards routine with uptime.
When you need specs, drawings, or a second pair of eyes, the Full Automatic Stacker Machine (DFM-1510-P / 1710-P) page has the DFM-series files and our service contact. And if your end-of-line automation stops at the stacker, our robotic palletizer solutions carry the stacked bundles straight to the pallet without a manual hand-off - the same air-pressure and interlock discipline keeps both machines honest.
Ready to take the guesswork out of your end-of-line? Request the DFM-series specifications or ask our team for the preventive-maintenance sheet we use on customer lines - and keep these faults off your shift report.